 Convert any tweet to static image
 Send email to anyone anonymously
 Check Alexa Rank for sites
How to enable and use proxy with Google Chrome
Set up proxy on Google Chrome - it just so happens that Google Chrome uses your computer's default proxy settings when making its own connections. If you're on Microsoft Windows, Google Chrome will use same proxy settings from Internet Explorer so if you enable proxy on Internet Explorer, proxy will also be enabled in Google Chrome. Chrome doesn't have its own proxy settings.
This page describes a manual way to change Google Chrome proxy settings which can be tedious so if you do this frequently, you may want to make use of one of Google Chrome extensions which simplifies this proxy changing process: https://chrome.google.com/webstore/search-extensions/proxy
To change proxy settings in Google Chrome, you must first access Chrome's settings page. The absolute fastest way to reach it would be to just paste this link straight into the address bar of your Google Chrome browser:
chrome://settings/
Otherwise just locate this button
 at the far right of your address bar and click it. From the dropdown menu that shows up, select Settings

Once the chrome://settings page opens up, scroll to the very bottom and click Show advanced settings and look below for Change proxy settings button

Upon clicking it, different things will show up depending on the operating system you're currently using. If you're using Microsoft Windows, Internet Properties window will show up

Once there, click "Lan Settings" button.

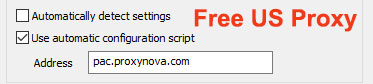
Check the checkbox that says Use a proxy server for your LAN and then enter an IP address and port of some proxy that could be found on our proxy server list page